Workflows
- Harald Sund (Unlicensed)
- Erlend Kvinnesland
Introduction
A workflow in Geocap is a way of combining datasets and actions or visualizations in sequence to produce visualizations, movements and powerpoint style 3D presentations. The Atlantis Project is used throughout this tutorial.
Exercises
Examine the workflows provided in the Atlantis project.
- In Geocap, click File > Open > File, and browse to the Atlantis folder, then open the the sub-folder called workflow.
- Double click on the file called Atlantis Basic Workflow.gwf to open it, or single click to highlight it and then click, Open. This will open the workflow below the project.
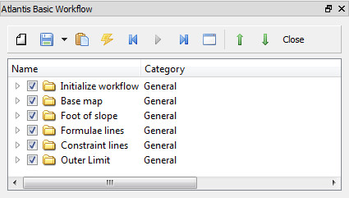
Atlantis Basic Workflow
- Examine the contents of the workflow items by clicking on the triangles next to the root folders.
- Click on the Go to first executable element
 icon and then click on the Execute next element
  icon. (This will initialize the basic display settings and nothing will appear in the display window yet)
 - Click on the Execute next element icon again and notice everything in the Base map folder will be displayed along with a short flight tour (animation).
- Continue clicking on the Execute next element icon until you reach the end of the workflow and observe how different elements of the Atlantis project are displayed.
Following the steps above, open and examine the other workflows in the workflows folder.
Note that the user may also execute each element one at a time by right clicking on the command and choosing Execute, see the image below.
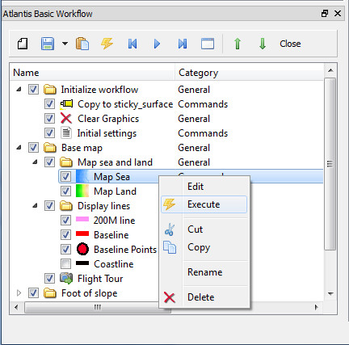
Executing individual commands one by one
Create a new workflow
In this exercise we will create a workflow that displays seabed and land and some important lines from the project.
- Click File > New > Workflow. Then a browser pops up.
The workflow is saved as a single file on disk with file extension *.gwf, (Geocap Work Flow). A good idea may be to create a folder in your project called Workflows and put the workflow there.
- Press the New Element icon to create the first entry. That may also be achieved by a right-click New Element.
- Select the Display
 command found in the Commands folder and click OK.
 - Right-click the Display command in the workflow and select Edit. Then this panel pops up:
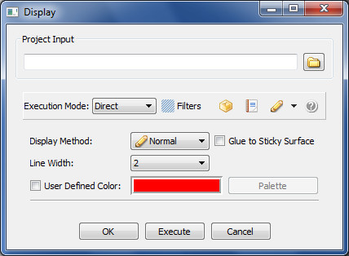
The Display edit panel
In a workflow, you will need to browse in an object from the project. The command usually requires a dataset to do an action on (such as a type of display).
- Browse to the coastline folder under 1. Maritime lines, highlight The Kingdom of Atlantis and click OK.
- Choose the display settings you like (color, glue to surface or not, etc.) and click OK again.
- Right click the element in the workflow and choose Execute. Alternatively, click the Execute icon.
- Examine how your display looks and edit the command if necessary to achieve the results you want by right clicking on the command and choosing edit.
- In order to keep your workflow organized it is recommended to change the name of the newly added commands from Display to something more descriptive like, Display Coastline Yellow which is done by right clicking the command and choosing Rename.
Note that commands may be copied from Shared commands, Item commands and Schema commands and pasted into the workflow.
- Right click the Map sea command in the Toolbox and select Copy
 . (It should be located under Schema Commands if you have selected a Seabed Surface.)
 - Click the Paste
 button in the workflow.
 - Again you must edit it and browse your seabed surface into the panel.
- Remember to save the workflow by clicking
