Adjust seismic 2D sections using a correction line
Introduction
It may happen that a depth converted seismic 2D section differs from the real bathymetry as found in a surface generated from multibeam data. This may be due to the depth conversion transition itself or it could be inconsistencies in the sonar and tide registrations.
It has thus been requested that Geocap should have a simple tool for correcting the seismic by shifting the seismic traces up or down according to a correction line.
Note that this procedure also may be used to perform a tidal correction of the seismic.
On this page:
Menu
The command menu for adjusting a seismic section is called Adjust seismic using a correction line. This command is by default not pinned to the seismic line so you must find it in the schema set of Commands. It also requires that the Depth Conversion plug-in module is loaded. Secure that the Plug-ins panel under Tools > Options > Plug-ins has the Depth Conversion checked in.
Two options for adjusting a seismic section
There are two options for adjusting a seismic section. These options are reflected in the menu and the user decides the choice.
- option. Input is two lines: First line is a correction line with correct height values and the second line is the corresponding interpretation line in the seismic. This is the default use.
- option. Input is one line: The difference line with difference values telling the adjustment difference of the seismic along the line.
All lines can start and stop arbitrarily within the seismic section. Updates will only take place where the correction line is defined.
Example of adjusting a seismic section using one difference line
The picture below shows a seismic section displayed together with an interpretation line for the seabed (red) and the seabed line (blue) sampled from a sonar grid of the seabed. Obviously there is an inconsistency.
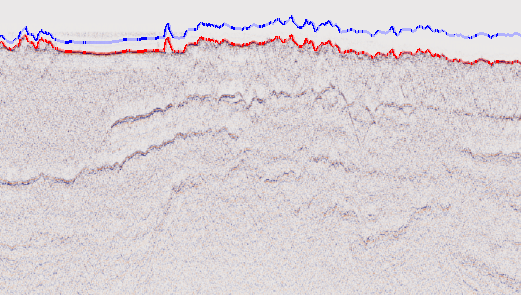
Details of a seismic section with an interpretation line (red) and the seabed line (blue)
After correcting the inconsistency the seismic section is lifted up to match the actual seabed line.
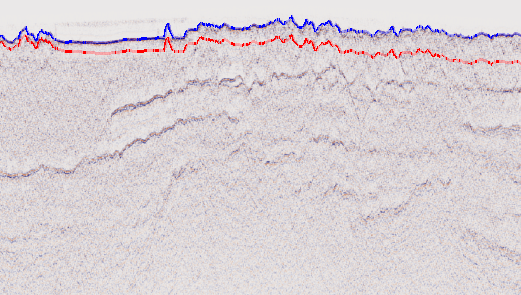
Adjusted seismic section with an interpretation line (red) and the seabed line (blue)
Procedure for adjusting a seismic section using one difference line
- Work out a difference line. Se below for a method to do this.
- Highlight the seismic line and go to schema commands and activate Adjust seismic using a correction line.
- Set the menu choice to The correction line has coordinates X Y difference_value
- Browse in the difference line
- Push Execute and the adjusted seismic section will by default be written into a new folder
Procedure for working out a difference line
A difference line is simple a line with x y z coordinates where the x y coordinates represent the position of the correction and the z coordinate represents the adjustment value. The difference line can cover all or just part of the seismic section.
- Digitize an interpretation line for the seabed in the seismic section. Call this line seabed_red. Save it in the project.
- Copy seabed_red to workspace.
- Assume the seabed grid is in workspace seabed.
- Make seabed_red active.
- Do in the shell: zap seabed. This command samples seabed values to the interpretation line. Call the result seabed_blue. Save it in the project.
- Do in the shell: sub lo seabed_red. This is the difference line. Call it difference_line and save it in the project.