/
T. Image Georeferencing
T. Image Georeferencing
- Harald Sund (Unlicensed)
- Tore Sannes (Unlicensed)
- Erlend Kvinnesland
Owned by Harald Sund (Unlicensed)
Last updated: Oct 21, 2015 by Tore Sannes (Unlicensed)
Introduction
This tutorial will guide you through the process of georeferencing a map. To georeference a map or image you need at least 3 tie points. These points should cover as much of the map as possible. In this tutorial we will use a sea chart from the Oslofjord. This chart has some marked positions referenced in WGS84, UTM Zone 33, as tie points.
Exercises
Exercise
Import an image into your project
- Create a Generic folder (i.e. a folder with schema Generic) and rename that folder to My Maps.
- Right-click the My Maps folder and go to Import > Generic. Browse for the image sjokart.png (a *.jpg or a *.png).
- Make sure the schema of the image set to Image Data.
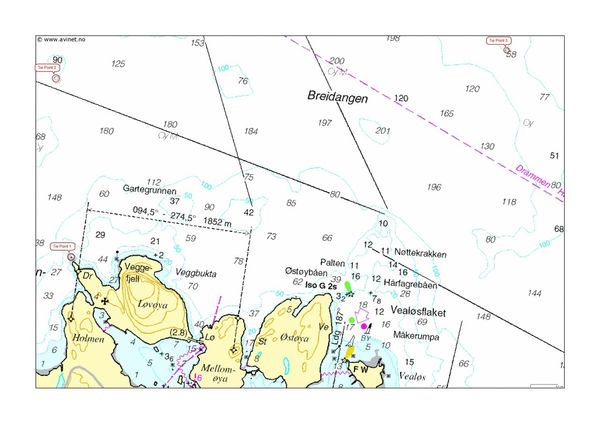
A map about to be georeferenced.
It is important to understand what coordinate system and datum the map is in - or make a qualified guess. Note also that you should be able to determine the coordinates of your tie-points, here encircled in red.
The tie-points can be find in the text file coordinates.txt:
Coordinate system: WGS84, UTM zone 33
Lower left: East: 241073.89 North: 6599354.87
Upper left: East: 240904.64 North: 6601351.49
Upper right: East: 245955.69 North: 6601663.55
Exercise
Georeference an image
Use the Georeferencing wizard to georeference an image. Follow the step-by-step procedure below.
Georeferencing step by step
- Make sure the image is selected in the project and right-click and select the Geo Reference command in the pop-up.
(If it is not visible you will have to open the Toolbox by View > Toolbox).
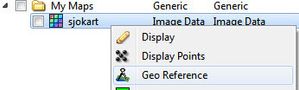
- Then the dialog for setting the coordinate system and a window containing the image is shown:
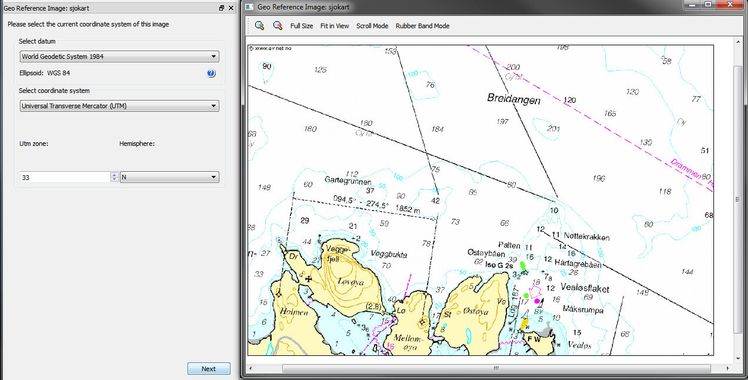
- Set geodetic properties of the chart: WGS84, UTM Zone 33 N.
- Click Next.
- Set Method: to Scale and Translate.
- Set Tie point Coordinate Format: to XY.
- Type in the X = 241073.89 and Y = 6599354.87 for the first tie point, click Image pick and click on the corresponding point in the map.
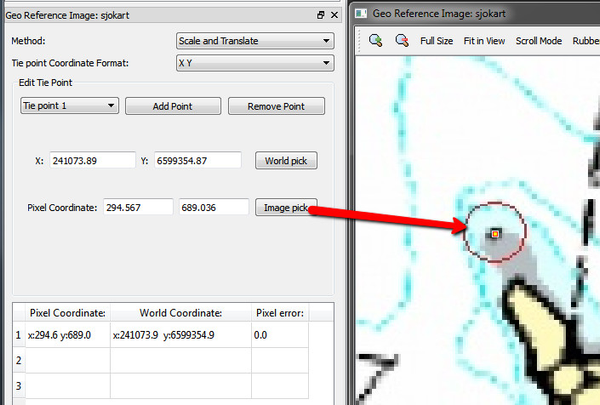
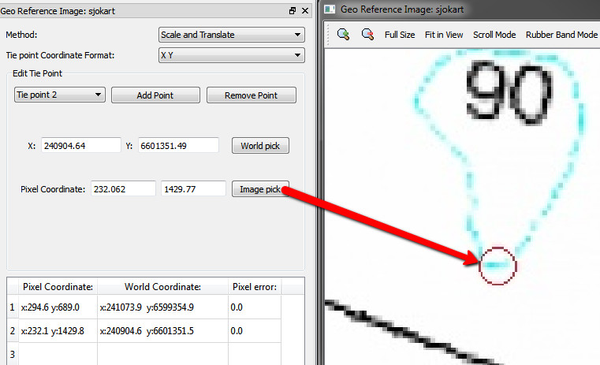
- Change to Tie point 2.
- Type in the X = 240904.64 and Y = 6601351.49 for the second tie point, click Image pick and click on the corresponding point in the map.
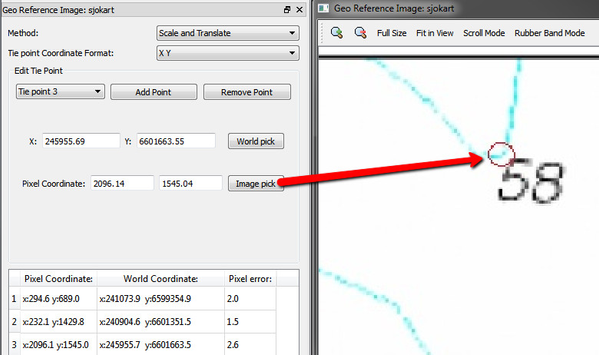
- Change to Tie point 3.
- Type in the X = 245955.69 and Y = 6601663.55 for the third tie point, click Image pick and click on the corresponding point in the map.
- Evaluate the result. The Pixel error represents the accuracy of the georeferencing. The value should not exceed more than 1 pixel on each point.
- Click Finish.
- Now the image must be transformed from UTM Zone 33 to UTM Zone 32.
Exercise
Convert an image to another UTM zone
- From the image sjokart, right-click and in the pop-up select All Commands > Shared Commands > Operations > Convert to UTM. (If it is not visible you will have to open the Toolbox.)
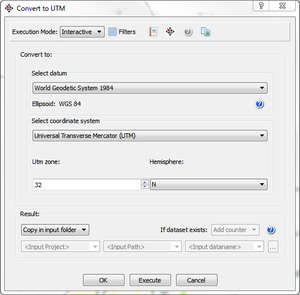
- Set the new geodetic properties for the image: WGS84, UTM Zone 32 N.
- Specify how to save the new image for e.g. Replace, Copy in input folder or Specify name and where to store it.
- Then click Execute.
- Display the new image in the main graphic window, and also display the multibeam data or the surface created from the multibeam data.
, multiple selections available,
Related content
Image Georeferencing - Map
Image Georeferencing - Map
More like this
A. Getting Started with Geocap Seafloor
A. Getting Started with Geocap Seafloor
More like this
C. Create a New Seafloor Project
C. Create a New Seafloor Project
More like this
V. PostScript Plotting
V. PostScript Plotting
More like this
Seafloor Tutorial
Seafloor Tutorial
More like this
N. DataLink for ArcGIS
N. DataLink for ArcGIS
More like this